Headshot Library Overview


|
Headshot Library Overview |


|
|
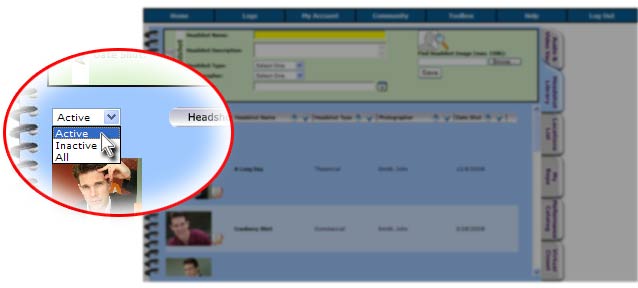
When you click on the Headshot Library Tab you are greeted by the Headshot Library Overview Screen.
Click on a link below to learn more about the different areas of the Headshot Library Overview Screen:
_______________________________________________________________________
To add a new image to your Headshot Library is easy! Just enter the appropriate information into the 'Add Headshot' Area located at the top of the Headshot Library Overview Screen.
Click to learn more about the 'Add Headshot' Area
_______________________________________________________________________
Click here to learn more about the Auditions Section
_______________________________________________________________________
By default, the Headshot Library Overview Screen shows only Images that are currently in Active Status. You can easily filter and view all of your Headshot images (whether Active or Inactive) by utilizing the Status Filter.
 Status Filter
Simply select the following filter options from the Status Filter drop-down menu:
Active: This will only show Headshots that are currently marked "Active" Inactive: Selecting this will show only those Headshots that HAVE BEEN entered as "Inactive" in the Headshot Details pop-up window All: This will show ALL Active and Inactive Headshots
Click here to learn more about Headshot Status
_______________________________________________________________________
As you add more and more images to your Headshot Library you will want an easy way to sort through them. That's where the 'Sort By' Columns come in handy!
 'Sort By' Columns
Simply click on the Ascending Arrow to sort by:
Simply click on the Descending Arrow to sort by:
_______________________________________________________________________
Would you like to change, add to, or delete any information regarding a particular image? Would you like to change the Headshot Status to Active or Inactive? It's a breeze!
Just click on the Edit Headshot Image Icon to access the Headshot Details pop-up window.
|