'Add Headshot'


|
'Add Headshot' |
|
|
When you are ready to add a new Headshot image (or any other type of image you use to promote yourself) then enter the appropriate image specifics in the 'Add Headshot' Area.  'Add Headshot' Area
You will notice several field boxes for you to enter information in.
Click on a link below to learn more about each field box:
_______________________________________________________________________
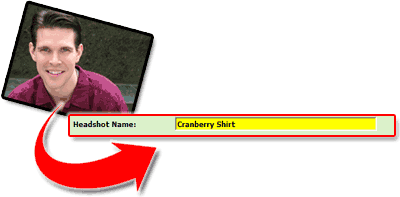
First things first, you must assign a Headshot Name to your image.
_______________________________________________________________________
Enter any kind of description information about your image (i.e. - where it was taken, time of day, what happened during the shoot, etc.).
_______________________________________________________________________
PerformerTrack has a pre-defined drop down menu of Headshot Types for you to choose from to assign to your image. Choose one of the following that best suits your picture:
_______________________________________________________________________
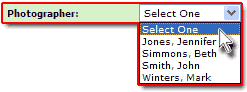
Who was the photographer who took the picture?
Select the Photographer from the drop down menu.
ADD BUTTON
INFO BUTTON
Learn more about everything the Contacts Section is capable of along with lots of tips and hints by reading the Auditions/Booked Projects Log: Contacts chapter in this User Manual.
_______________________________________________________________________
CALENDAR BUTTON
_______________________________________________________________________
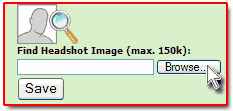
Finally, it's time to upload the image you have been writing all that information about!
Click on the 'Browse...' button to locate the image file on your computer's hard drive. Once you locate it, simply click the 'Save' button to upload the image!
|